Introduction
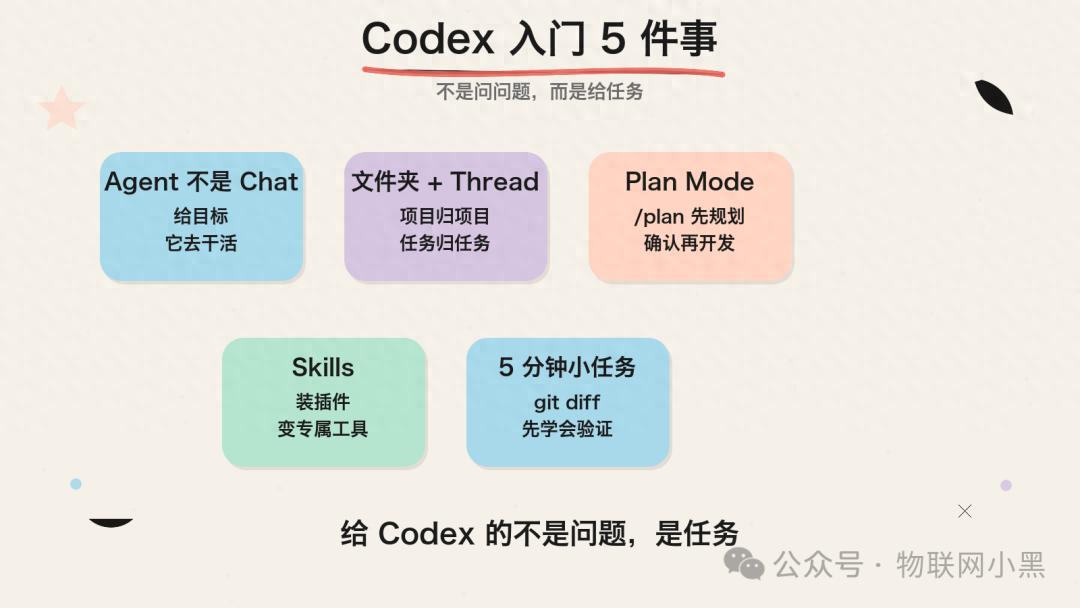
Codex tutorials abound, ranging from lengthy guides to simple installation commands. However, many users still struggle to utilize it effectively, not due to poor tutorials, but because Codex operates differently from other AI tools. This article focuses on five key concepts that will enable you to start using Codex effectively.
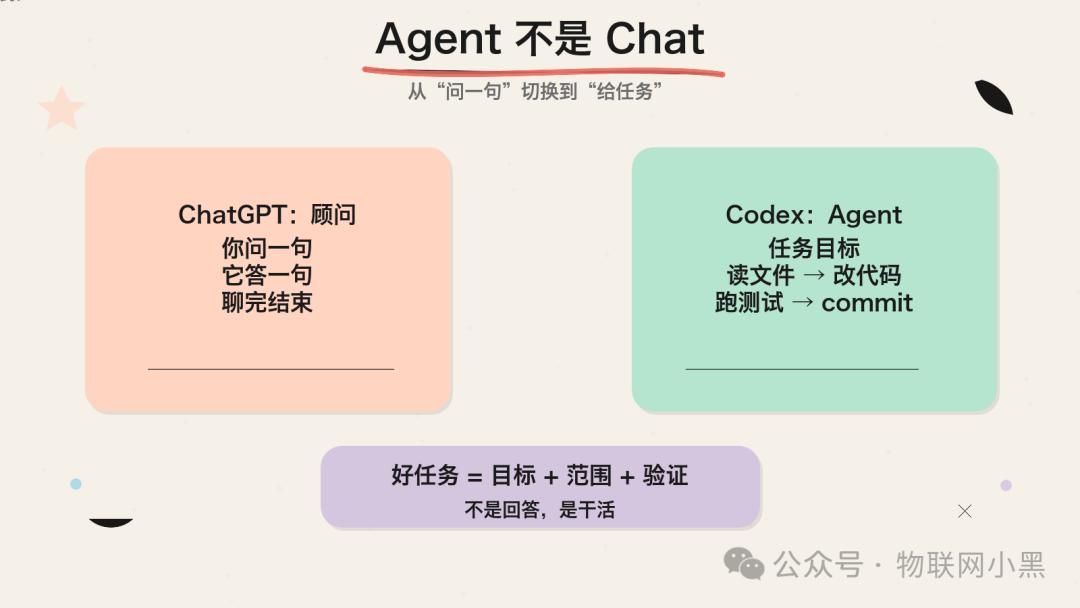
1. It’s an Agent, Not a Chat
A common misconception is that Codex functions like ChatGPT. While both have a chat interface, their purposes differ significantly. ChatGPT is designed for Q&A interactions, providing one-off responses. In contrast, Codex is task-oriented; it continuously works towards a goal you set—reading files, modifying code, running tests, and making commits.
Think of ChatGPT as a consultant you can ask questions, while Codex is like an intern you hire to accomplish tasks. This distinction is crucial for how you interact with Codex.
Incorrect usage: “Help me write a Python scraper” (too vague, lacks context)
Correct usage: “Check this project directory, complete the installation steps in the README, and run it to confirm there are no errors.”
Codex requires tasks with clear goals and scope.
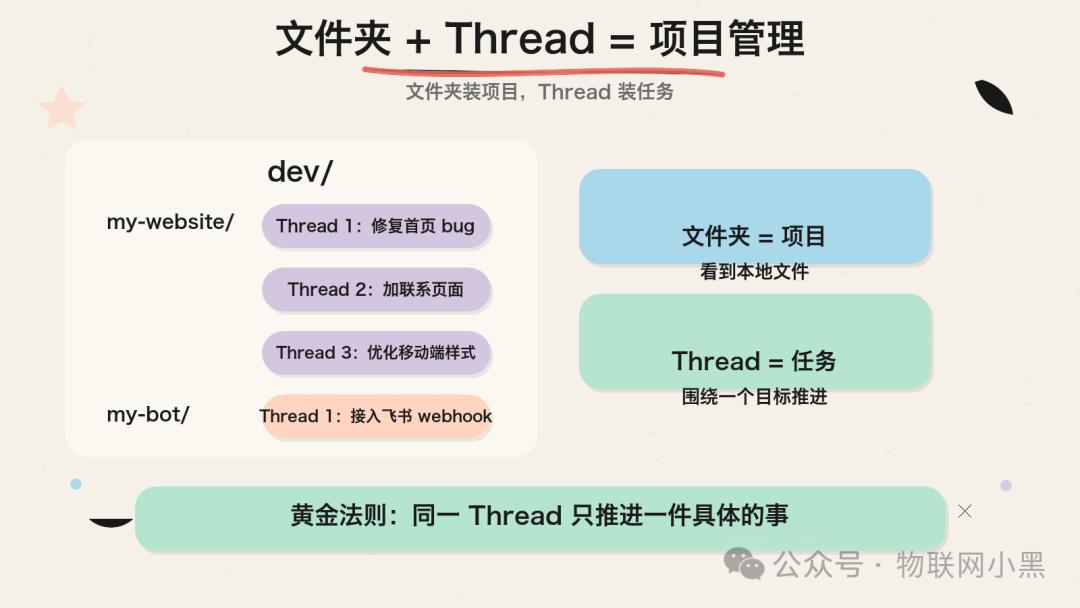
2. Folders + Threads = Project Management
Upon opening Codex, you’ll notice a two-layer structure on the left sidebar. Many users overlook this and jump straight into typing.
Folders: These represent your local project directories. When you add a folder to Codex, it can access all the files within it.
Threads: These are task lines focused on specific goals. A folder can contain multiple threads.
For example:
dev/
├── my-website/  (project)
│   ├── Thread 1: Fix homepage bug
│   ├── Thread 2: Add a contact page
│   └── Thread 3: Optimize mobile styles
└── my-bot/
    └── Thread 1: Integrate Feishu webhook
Folders hold projects, while Threads hold tasks. This design alleviates the confusion often experienced with AI, where multiple discussions can get tangled. Codex separates projects and tasks, allowing for organized progress.
Remember the golden rule: Same folder for the same direction, same Thread for one specific task.
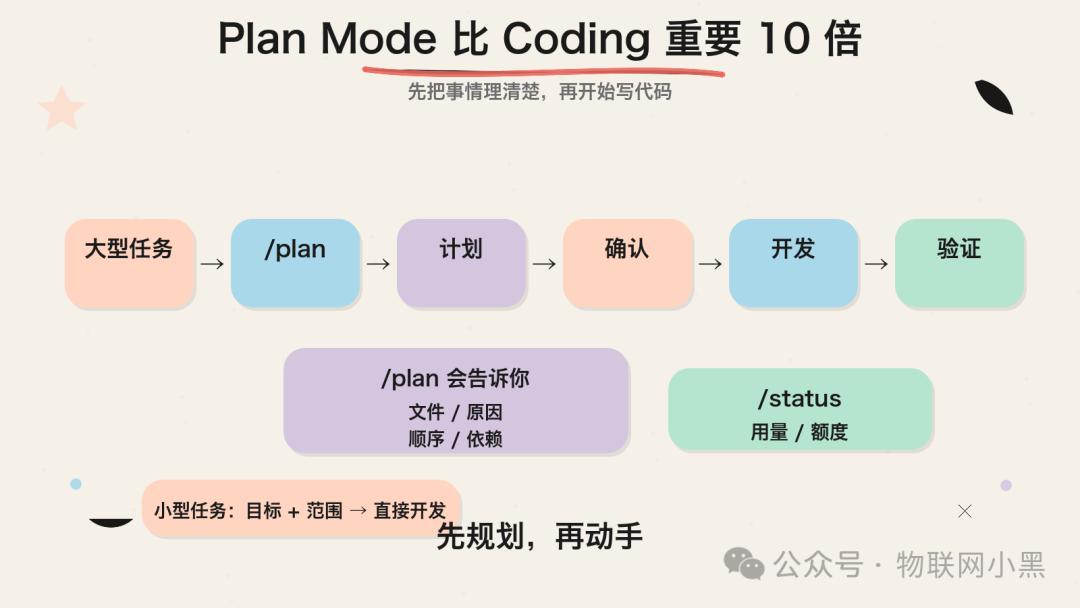
3. Plan Mode is 10 Times More Important than Coding
If you remember one feature from this article, let it be Plan Mode. By typing /plan in Codex, it helps you outline what needs to be done before writing any code.
It will clarify:
- Which files need changes
- Why each file needs changes
- The order of tasks
- Any missing dependencies or configurations
Confirm the plan before starting to code. This feature is crucial because most issues arise not from AI’s inability to write but from users not clearly defining what they want.
Instead of saying, “Help me build a website,” let Codex plan out the pages, framework, and data sources first. This significantly increases the likelihood of success.
Recommended workflow:
Large tasks → /plan first → Confirm the plan → Start development
Small tasks → Clearly state the goal and scope → Start development
Another useful command is /status, which shows your current usage and remaining quota.
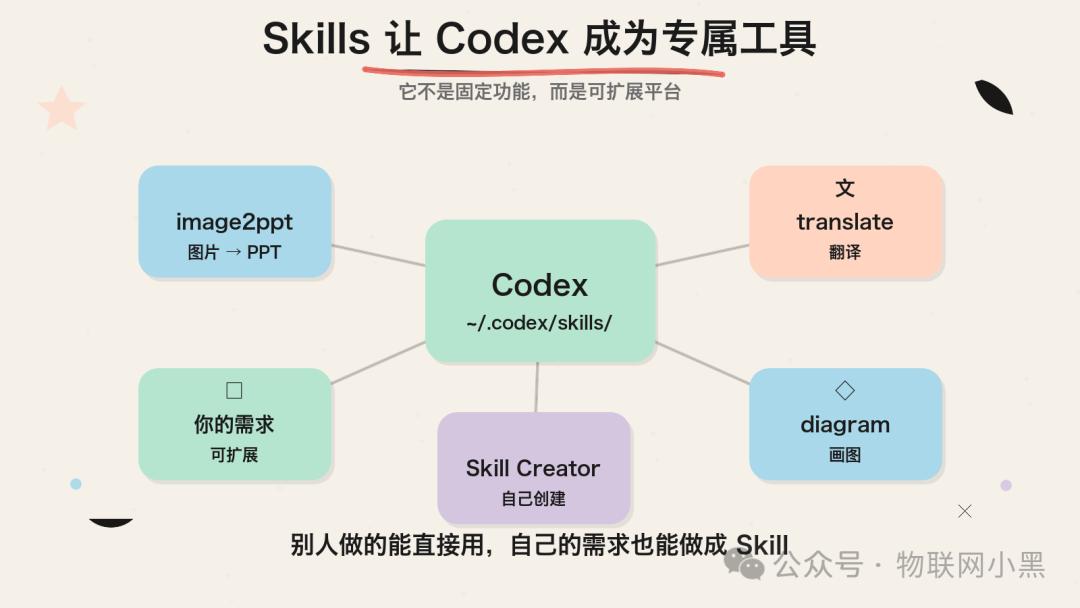
4. Skills Make It Your Custom Tool
Codex features a Skills system, allowing you to add “plugins” that enhance its capabilities. For example, a skill named bggg-creator-image2ppt enables Codex to convert images into editable PPTs.
Skills are stored in the ~/.codex/skills/ directory, and adding a skill involves placing the corresponding folder there. Codex also offers a graphical Skill Creator, allowing you to generate skills without writing configuration files.
For beginners, the significance of Skills is that Codex is not a fixed-function tool; it’s an expandable platform. You can use existing skills or create new ones based on your needs.
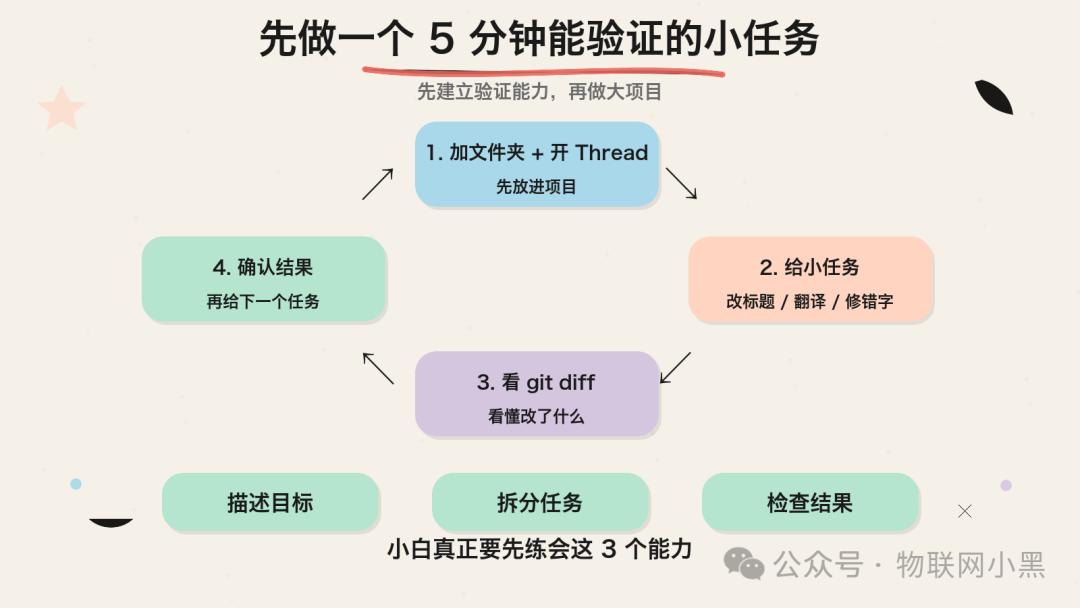
5. Start with a 5-Minute Verifiable Task
After installing Codex, many users feel compelled to tackle a large project. However, your first task should be as small as possible, such as:
- Changing a title in a README
- Translating a short passage
- Fixing a noticeable typo
- Analyzing a project directory structure
Why? Because you need to establish verification capabilities. You should understand what changes were made and confirm their correctness. If you can’t identify mistakes, larger projects become risky.
Recommended starting sequence:
Step 1: Add a folder and start a Thread
Step 2: Assign a very small task and observe execution
Step 3: Use git diff to see what changes were made
Step 4: Confirm correctness before assigning the next task
MaynorAI aptly stated that for beginners, the most important things are to:
Describe goals, break down tasks, and check results.
Mastering these three skills will accelerate your progress.
Appendix: Quick Installation Guide
Requirements:
- ChatGPT Plus / Pro / Team account (Codex is included in the subscription)
- macOS or Windows 10
Installation:
- Mac:
- Search for Codex in the App Store or download directly →
- https://persistent.oaistatic.com/codex-app-prod/Codex.dmg
- Windows:
- Search for Codex in the Microsoft Store and follow the installation prompts.
After opening, log in with your OpenAI account.
Recommended first steps:
- In Settings → Personalization, set your collaboration preferences (e.g., “Default to Chinese”, “Plan before changes”)
- Add a local folder
- Start a Thread and assign a small task for testing.
Recommended Learning Resources
For a more comprehensive tutorial, check out the resource compiled by MaynorAI:
This covers everything from understanding to installation and practical use, written solidly.
Codex isn’t difficult; the challenge lies in changing how you collaborate with AI. It’s not about asking questions but assigning tasks. It’s not about completing everything at once but planning before acting. Understanding these five concepts will give you a solid foundation, surpassing 80% of Codex users. The next step is to start working.
Comments
Discussion is powered by Giscus (GitHub Discussions). Add
repo,repoID,category, andcategoryIDunder[params.comments.giscus]inhugo.tomlusing the values from the Giscus setup tool.